Index Menu
Back
Main Menu
Forward
 
TUTORIAL: The Magic Metal Writer
 
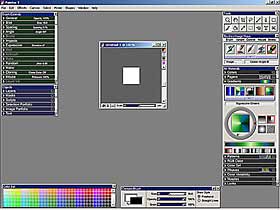
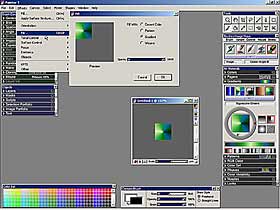
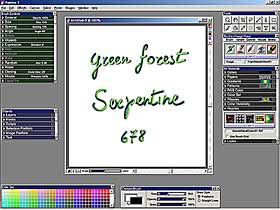
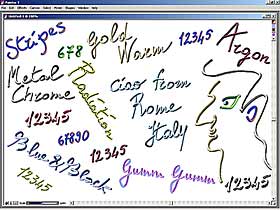
                                    P  R  E  M  I  S  E
The Purpose of this my Tutorial is the one to create a material that allows to paint or write 
with a Metallic Ink,  using a Brush.  You must own a Graphic tablet  to use at your best this 
Tutorial,  for the simple motive  that I think it is a little complicated  to write within an 
image  in a flent way  only using a mouse... In effect you can execute  this tutorial also if 
you use only a mouse, but you do not expect the results you can obtain with a graphic tablet! 
The Program  used  for  this Tutorial  is  Fractal Painter ©,  from  the Corel Corporation ©. 
This tutorial is written for PC, but with the alternative keys is valid also for MacIntosh ©. 
If you click with left mouse on images  by side of text  you will see them to more dimension. 
                                 P  R  O  C  E  D  U  R   E

01 - Click on File/New  and Open  a new image of 60 x 60 
Pixels size, called "Untitled-1". 
02 - The  Owners  of  Corel Painter 7.0 ©  Click on  Art 
Materials/Gradients/Load Library  and  load the Gradient 
"Gradients/Painter6.grd"   from  the  CD  n.2  of  Corel 
Painter 7.0,  that is  the old Painter 6  Gradients.  So 
also  the users  of Painter 6  could easy follow this my 
tutorial, using simply its Basic Gradients.  Off we Go!! 
Click now  on Art Materials/Gradients, Load the Gradient 
"Expressive Greens" and Rotate it to 0 Degrees  with the 
provided Little Red Round Button,  as you can see in the 
pic here on right. 
Image01
Image02
 03 - Click on Effects/Fill (CTRL+F) and select Fill With 
 Gradient and 100% Opacity. 
 04 - You must  now  give  a  few  of Blur  at your small 
 image,  that is  at "Untitled-1",  so  click  before  on 
 Tools/Brush  and  after  on  Brushes/Photo/Blur.  Set in 
 Controls:Brush Size=20, Opacity=50% and Grain=20%.  With 
 this Brush soft the image in "Untitled-1", starting from 
 the center towards the external edges. 
05 - You  must   now  create  a  Circular  Selection  on 
"Untitled-1",  so  click  on  Tools/Oval Selection  and, 
starting from the Left Top Angle, proceeding towards the 
Right Low Angle,  with Key SHIFT Down  on your Keyboard, 
create a Regular Circular Selection. 
06 - Click on Edit/Copy (CTRL+C) and after on Edit/Paste 
(CTRL+V), so you will create the Layer 1 with within the 
content of your Circular Selection. 
Image03
Image04
 07 - In Objects/Layers  you  must  deselect  the  Canvas 
 Layer,  clicking  on its icon  with an open eye  so that 
 this icon becomes a closed eye.  Click on Layer 1 and so 
 select and enable it. 
 08 - Click on  Object/Layers/Group,  so that the Layer 1 
 will change in "Group 1". 
 09 - Click  on  "Brushes:Nozzle/Make Nozzle From Group". 
 10 - Click  on File/Save  and  name it  for  example  as 
 "NozzleMetalGreen01.RIF".  You must  always  remember to 
 save in ".RIF" format. 

11 - Click on  Brushes:Nozzle/Load Nozzle  and  open the 
File of the Nozzle that you have just saved, that is the 
file "NozzleMetalGreen01.RIF". 
12 - In its relative windows  insert the Width  and  the 
Height of every Cell of the Grid (Item Width=60 and Item 
Height=60),  the Number of Ranks of the Nozzle,  in this 
case 1 (Index Rank).  Finally  insert for every Rank the 
number  of interested Cells,  so  in Rank 1 (Horizontal) 
Square write Number 1, in Rank 2 (Vertical) Square write 
Number 1  and  also  in  the  Rank 3 (Vertical Extended) 
Square write Number 1. Give OK. 
Image05
Image06

 13 - Now  you can  also  Add the New Nozzle in permanent 
 way  to your Nozzles Library with Art Materials/Nozzles/ 
 Add Nozzle To Library. 
 14 - Click  therefore on Brushes:Image Hose,  select the 
 Variant Linear-Size/P.  Click on Brush Controls/Size and 
 insert in Size a value from 5 to 30,  as you like. Click 
 on Brush Controls/Spacing  and  here insert the value of 
 Spacing=10% and Min Spacing=1.0
 15 - Click on Brushes:Variant/Save Variant and Save your 
 New Variant with the name "FrankMetalWriter01". Click on 
 OK.  Remember  also  to  restore  the  previous  Variant 
 Linear-Size/P to its basic values. 
16 - Close  all the images that you still have opened on 
your  Desktop.  Click  on File/New (CTRL+N)  and  open a 
new file of 500x500 Pixels size.  Then put your Pen  (or 
your mouse  if are able to make it) on the new image and 
begin  to  paint  with your new Nozzle,  that is  with a 
Magic Metal Handwriting!  But  remember:  once  you have 
absorbed this procedure, you can create the most amusing 
and different types of inks.  The real Limit?  Well only 
one: Your Fantasy and Ability!! 
Image07
Image08
 17 - You can create the basis for your Metallic Brush in 
 several other ways.  You  can  start  not  only  from  a 
 Gradient you have in Art Materials/Gradients  or created 
 from you,  but  also starting from many other options of 
 Fractal Painter.  For example I've created the basis for 
 a Golden Metallic Brush  starting from an image of 50x50 
 Pixels  size,  colored  with Effects/Fill/Current Color. 
 I have  then made a Circular Selection in the image with 
 Tools/Oval Selection  and after I made Copy and Paste in 
 order  to create Layer 1 in Objects/Layers.  Then I have 
 applied  the Dynamic Layer  Objects/Dynamic Layers/Bevel 
 World  and I've inserted parameters you can see on left. 
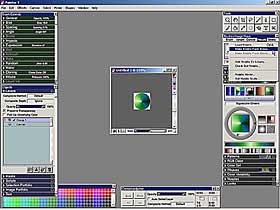
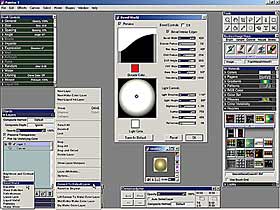
Then the Dynamic Layer was transformed in Normal Layer with Objects/Layers/Convert to Default 
Layer  and  the Metallic Nozzle  was created  from this Layer  with Objects/Layers/Group  and 
Brushes:Nozzle/ Make Nozzle From Group. Really Easy and Amusing!! 
18 - Here  you  can  see  a  little  series  of  various 
examples of Nozzle-Inks that I have created  in a few of 
minutes  really  with  a great facility  and  amusement! 
Image09

Indietro
 
Avanti

I have written this page in Italian language and after I have translated it in English language.
If you find some my translation's error, excuse me and send me an e-mail with the correct version. Thanx !!
Please Remember That Everything On This Web Site Is Copyrighted.


All rights reserved. Copyright © 2000 by Francesco Franceschi.